Monitor
A/B test AI Personalization
Learn how to A/B test AI Personalization.
Beta
AI Personalization is a beta feature according to the Algolia Terms of Service (“Beta Services”).
Before your begin
Before setting up an A/B test, make sure you have properly configured AI Personalization.Launching an A/B test
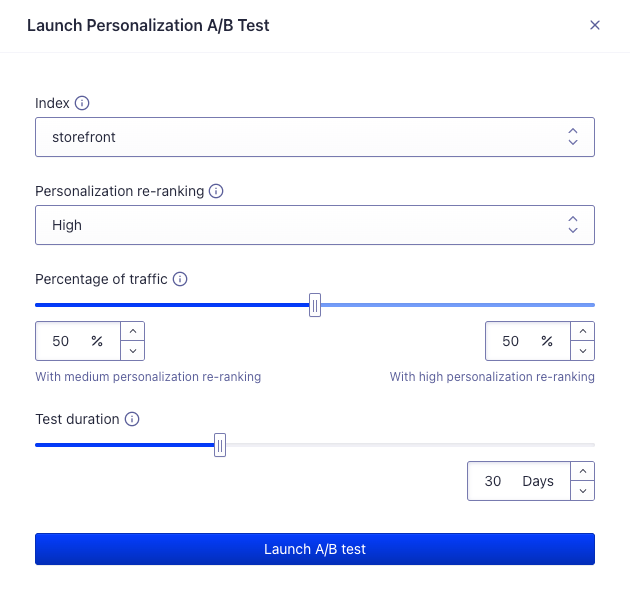
Dashboard interface for launching an A/B test
1
Select the index on which you want to A/B test personalization
This is the index for which search results will be compared.
You only have access to indices that are configured to use AI Personalization.
2
Define the personalization re-ranking level for the A/B test
This is the level of personalization you want to A/B test against the personalization re-ranking from the configuration.
3
Set the percentage of traffic
This is the share of searches that will be boosted according to the personalization re-ranking level set.
4
Set the duration of the test
This is the maximum duration of time the A/B test will be live after you start it.
For the best results, set a duration that’s more likely to lead to high confidence in results.
5
Launch A/B test
This triggers the launch of the A/B test.
Your users will now receive personalized search results based on your setup.